How Hands-On Robotics Brings Science Lessons to Life
By: Katie Blagden and Barb Tennyson
It can be something of a challenge to incorporate hands-on learning into earth and life science units. For example, many life science units focus on looking at plants and animals and reading about their environments, leaving out the integral hands-on experience. As elementary STEAM educators, we have both developed tech-infused lessons, incorporating engineering and robotics, that increase student engagement and bring earth and life sciences to life. These projects are rigorous in teaching the subject at hand, and their playful side encourages collaboration both during and after the lesson.
The ‘Windy Day’ Project
In Barb’s first grade classes, STEAM lessons revolve around wind and weather. One example is the “Windy Day” project. We start by talking about science vocabulary. It’s first grade, so we focus on questions like what’s hot, what’s cold, what does wind feel like, and what does it look like outside?
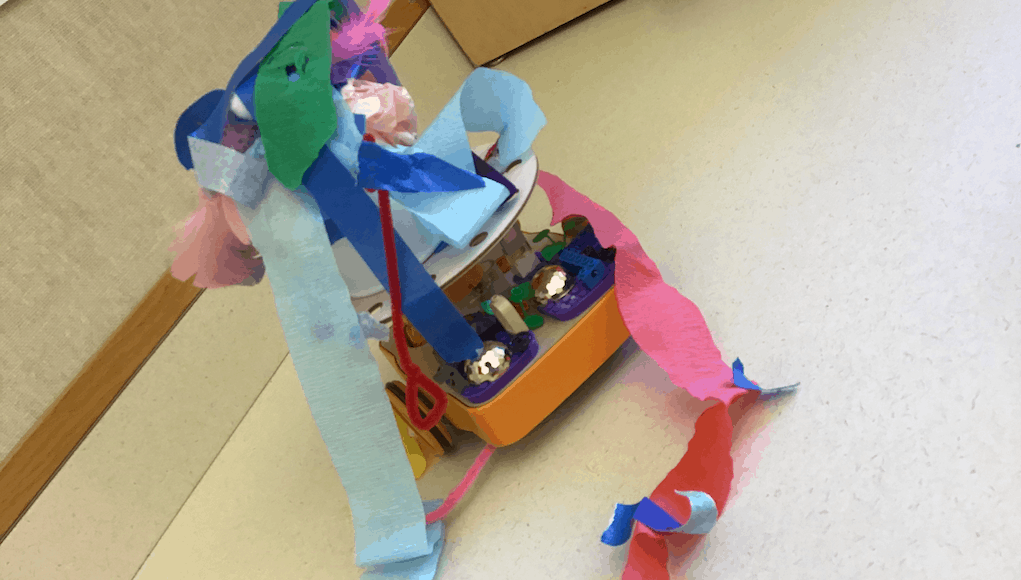
To simulate a windy day, students use art materials like streamers and feathers and attach them to a KIBO robot. They code the robot by creating sequences of programmable wooden building blocks that have commands printed on them, and then use the robot itself to scan the blocks and start their program to recreate a windy day scenario. They sometimes include the robot’s sound module to record their own windy day sounds. They make silly sounds of wind rushing or record their voice telling the story of the robot’s windy-day experience. These recordings become part of their program.
The first time the robots come out, we set a timer, and they have two minutes to put it together with no directions. It’s amazing what first graders can figure out in two minutes! We intentionally don’t give every student their own robot. It’s usually three in a group, and everybody has a job. A lot of our work is about getting kids to know what it looks like to work as part of a group. Before the lesson, we go through strategies for how to make decisions as part of a group, and at the end, we ask them to reflect on why they built their KIBO the way they did, and why the program they coded made their construction look and act like a windy day.
How Do Animals Survive in the Winter?
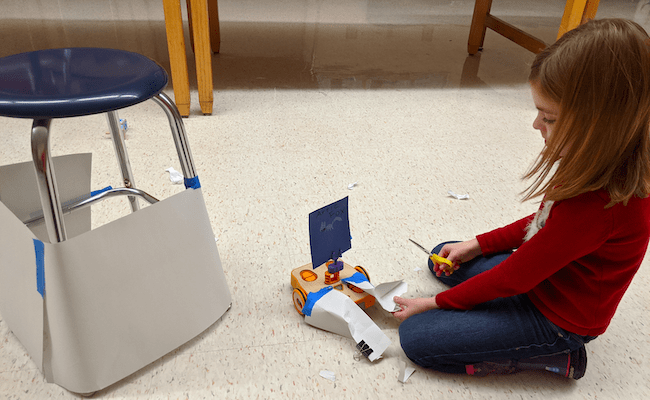
One of Katie’s favorite and most engaging first-grade life science lessons combines animal survival and coding the KIBO robot (see header image). The unit starts with a compelling, standards-based question: “How do animals survive in the winter?” Students brainstorm and construct explanations by sharing ideas and drawing models. It’s also helpful to contrast animal survival techniques and adaptations with humans’ solutions to surviving in the winter.
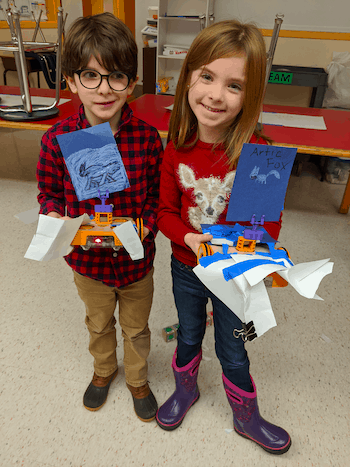
Next, students get to the best part: applying their knowledge by coding a robot. First, they decorate their robots as winter animals, such as arctic foxes or polar bears, that they have previously researched. They get together with partners and choose an animal to draw. They then draw it using white crayons on blue paper and attach it to their robot. The class discusses what food and shelter their particular animal needs to survive a cold winter, then students create a model shelter using paper to make a dome where their “animal” can sleep.
The class then talks about how animals use body parts like arms and beaks to collect food. Students add arms and claws or beaks to their robot using paper, tape, and binder clips. Then they create a sequence and program their robots to scoop up the model food they created out of paper and bring it to their shelter. They set a timer, and the animals need to bring food inside their domes within a certain amount of time before they “freeze.” It challenges students to work out a sequence with their KIBO blocks and to scan the blocks to get their robot animals to move a certain way in a short amount of time. As a bonus, there can be predator animals added to the game as well.
For assessment and to communicate their learning, students use an interactive media app called Seesaw. They record themselves discussing what they learned in the lesson, and they share a picture or video of their project. This is an effective way to check for student understanding, especially in large classes of active students.
Taking Time for Collaborative Reflection
At the end of every class, we both ask students to share what worked and what didn’t work. It helps them find alternative solutions to common problems by collaborating with their peers. It also allows both teachers and students to see patterns in successes and challenges.
Using open-ended tech tools allows students to understand life and earth science topics through true representation. As elementary teachers, we love blending coding and engineering with valuable science concepts. Every project students create ends up looking different because they don’t have step-by-step instructions. Instead, they have the freedom to show what they understand and bring it alive with creative robotics.
For more, see:
- Rev Up Robotics Aims for Computer Science Accessibility & Application
- It’s Time to Add AI to Your Robotics Competition
- How a STEAM-Integrated Environment is the Classroom Makeover You Really Need
Stay in-the-know with innovations in learning by signing up for the weekly Smart Update.
Katie Blagden is a K–4 STEAM educator and science curriculum coach at Ayers Ryal Side Elementary School in Beverly, Mass. She can be reached at [email protected].
Barb Tennyson is the instructional technology specialist and STEAM educator at the John Eliot Elementary School in Needham, Mass. Follow her on Twitter: @btennyson.




Madeleine Dean
I love this! These are some great suggestions to get students to have more hands on experiences with these kind of STEM subjects. At CVESD they incorporate hands on STEM projects through things like innovation stations where students can complete these kind of projects.