Making in a Middle School
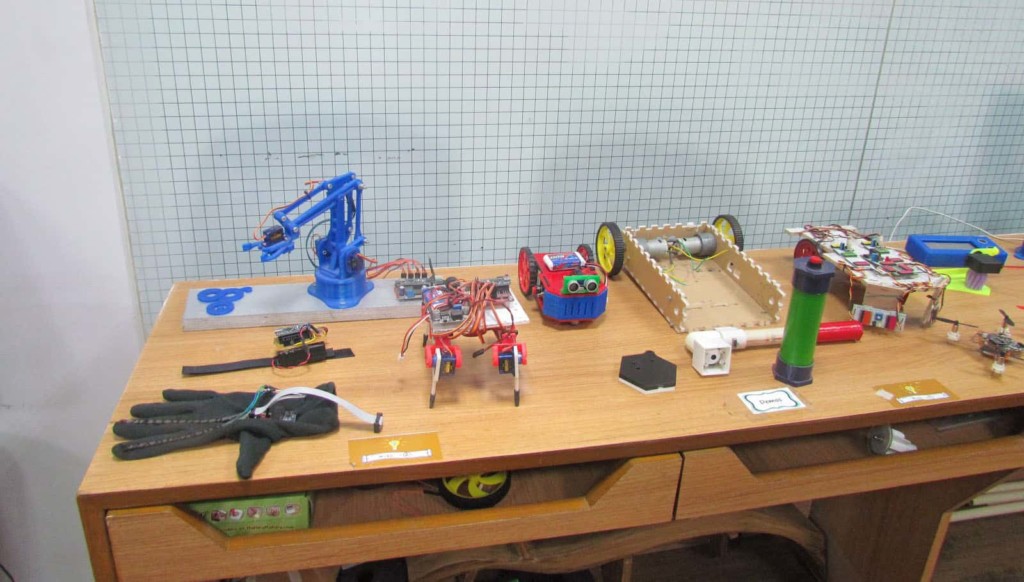
This year we decided to create a MakerSpace elective at our 5-8 middle school. We offered it to incoming 6th graders on their course selection guides at the end of 5th grade, and we limited the class to 20 students. I was thrilled when the class filled quickly and had a waiting list!
When the class began, I spent the first six weeks setting the stage. We had a unit on growth mindset, creative thinking, design thinking, and drawing. Design thinking really helped the students understand problem-solving and creating products with someone else in mind. To help us with this process, I used many resources from Stanford’s d.school; they have a great wiki that includes how-to guides for teachers as well as design challenges to walk through with your students. We talk a lot about prototyping and planning as ways to refine your product but also ways to conserve resources.
After the groundwork had been laid, we started our maker rotations. We have six rotations: woodworking, cardboard, green screen, podcasting, Makey Makey and Squishy Circuits. Students stay in each rotation for four weeks and their projects are expected to be extensive. However, each rotation can be condensed and projects scaled back. I’ve done most of the rotations in 4 class periods (versus the 20 class periods we have now) in previous years. Podcasting and green screen have the most trouble with a shortened time period, the kids just don’t have enough time to write a good script, get it recorded and edited.
In woodworking and cardboard, the students are paired. The students should first go through the design thinking process so that they can create something their partner needs. The design thinking process helps students gain empathy with their audience, in this case, their partner. They do this by interviewing each other about their wants and needs. Students then take that information to clearly define the problem their partner is having. Design thinking helps students go beyond “I want this, please make this for me” to help students really understand problems and move towards innovative solutions. Next students ideate – they create ideas to solve their partner’s problem, they seek feedback from their partner and use that feedback to improve their idea. Students also create a prototype of their solution and get more feedback from their partner, all before they begin building with the cardboard and wood.

The green screen and podcasting groups both start out watching, listening and reviewing podcasts and videos. The green screen students self-select YouTube videos on how to create green screen videos, as well as videos created using green screen technology. Students are looking for tips and tricks to use in their videos as well as getting an idea of what they can do with a green screen. To get started with podcasting, students can listen to podcasts from two recommended sites: Common Sense Media’s list of podcasts for kids and NPR’s podcast directory for kids and families. As they listen they should be looking for the common elements and technical aspects they’ll need to include in their project. From there, they start writing and editing their scripts. They also do some pre-production work like securing interviews, making props and obtaining images for the green screen. Finally, they record. The green screen group uses a video camera and Wirecast to record and iMovie to edit. Wirecast can be expensive but our district pays for it to facilitate video announcements. Our MakerSpace class reaps the benefits. There are some free green screen software programs that you can learn more about here. The podcasting group uses GarageBand and a Yeti microphone to record and edit.
The Makey Makey group also starts out exploring. A Makey Makey is an invention tool that students can use to control the computer. The Makey Makey is connected to the computer through a USB port. Students connect wires to the Makey Makey controls – directional arrow keys, click and space. The other end of the wire can connect to a wide variety of items. Anything from bananas to playdough. My students use playdough. Once everything is connected students touch the playdough to control the computer. They set up the Makey Makey and play games from the Scratch website, which is a coding platform from MIT. Users save their creations for others to see and use. After they get a feel for the Makey Makey they log into Scratch and begin creating their own video games. Students can see the code from the games they’ve played. They also use YouTube to find tutorials for the things they’d like to do in Scratch.
Squishy Circuits is a new addition to our MakerSpace. Squishy Circuits allows students to use conductive play dough and insulating play dough to create a wide variety of circuits. The group starts out exploring circuits in general. They then start creating their own simple circuits and build up to more complex projects. Their end goal is to create something new and original from the circuits and dough.
Providing an Audience and Reflection:
My goal is for the students to have a real audience. That’s why they are creating for a partner in woodworking and cardboard. Their podcasts, green screen videos, and video games are posted on my teacher website. I video their Squishy Circuit project to include on my website as well. Occasionally, I share their work via Twitter. At the end of the rotation, the students complete a reflection form. The form asks them to respond honestly to questions such as “I used my time and resources wisely”. The last question on the form gives them the opportunity to give advice to the next group. I post the advice on the portion of my teacher website with the instructions for the project.
Our MakerSpace room is available to teachers throughout the day as well and our most popular station is the green screen. Groups love to come in and create green screen videos for their classes. I am hoping to work with the science department to see how they can integrate Makey Makeys and Squishy Circuits into their curriculum in the Spring. I keep our Cardboard Corral (a PVC pipe creation of mine used to neatly store cardboard) filled with cardboard that’s available for students to use for projects in other classes.
If you’re a middle school teacher interested in adding making to your classroom, I’d recommend starting with supplying your classroom with some cardboard, duct tape, and other craft supplies. Let students know that they can build things to help them learn or show mastery of their learning. Coding is an awesome way to develop computational thinking skills. You can start with Hour of Code in December and build on it with Scratch. Makey Makeys are a relatively inexpensive way to have kids creating. Hand them to your students and let them discover what they can do. The possibilities are endless! The main thing is to get started. Let students use their hands, their minds and creativity to show you what they know!
For more, see:
- School Library Makerspaces: the Bold, the Brave and the Uninitiated
- Making in Math
- The Case for School Makerspaces, According to Those Who Use Them
Stay in-the-know with all things EdTech and innovations in learning by signing up to receive the weekly Smart Update.



0 Comments
Leave a Comment
Your email address will not be published. All fields are required.