
#FETC | Incorporating STEM and Tinkering Across the Primary Grades
Since opening our new makerspace this fall, we’ve hit it hard to continue incorporating more STEM and tinkering throughout our school, especially in the primary grades. We’re framing tinkering as a genuinely lifelong and lifewide (if that’s a word) skill. We’ve been busy developing projects across all subjects from science to world languages and across varying levels of PBL-ness from relative similarity between students to an amazingly wide variety according to each student’s passion. I’m very proud to say that we’ve been named finalists for the FETC STEM Excellence Awards for our efforts and outcomes!
The four activities that my colleagues will be presenting at FETC represent the range of subject areas and levels of student independence we’ve been working towards. They’ll be sharing:
- A PreK project building “bat ears” following a unit exploring bats and their habitats.
- A 1st grade Spanish project building LED-lit Dia De Los Muertos candles.
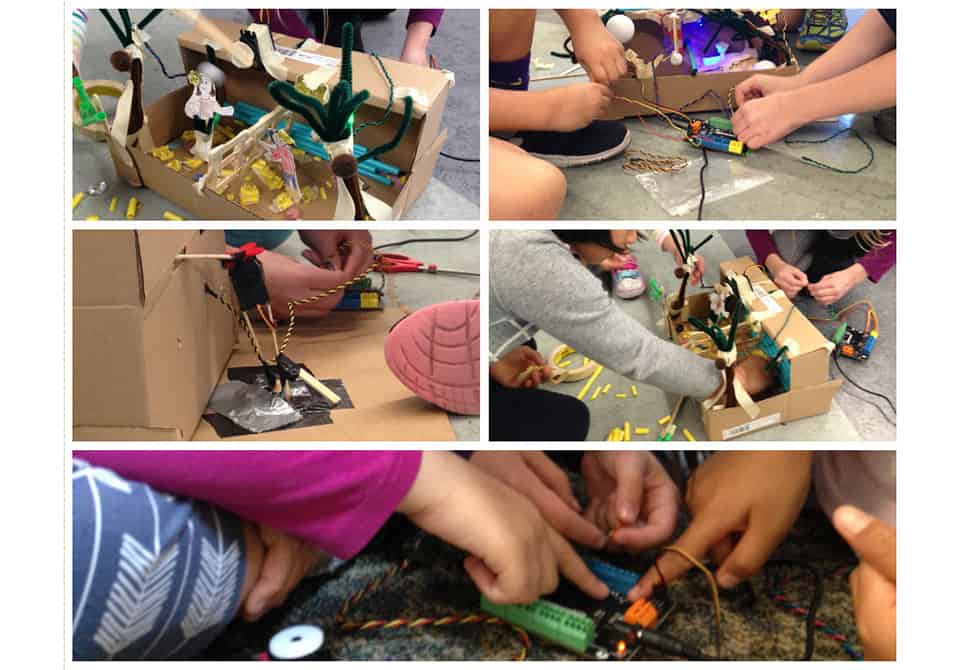
- A 2nd grade language arts project creating a robotic diorama of their favorite scene from a book, using Hummingbird Robotics kits.
- A 5th grade science project using cardboard gears to create a before/after graphic demonstrating changing weather patterns due to climate change, and a Mandarin project using gears to describe daily routines using target vocabulary.
PreK Bat Ears
The PreK project arose out of the children’s interests and discussions about what it must be like to be a bat, and their interest in “hearing like a bat.” Since PreKers are among our youngest students, we haven’t been giving them full run of the makerspace materials, but rather have whittled down to a still-quite-broad selection. Over three makerspace visits, the PreKers prototyped their bat ears, returned to the model photos of bats for comparison, and identified features that they could change to be “more like a bat.”
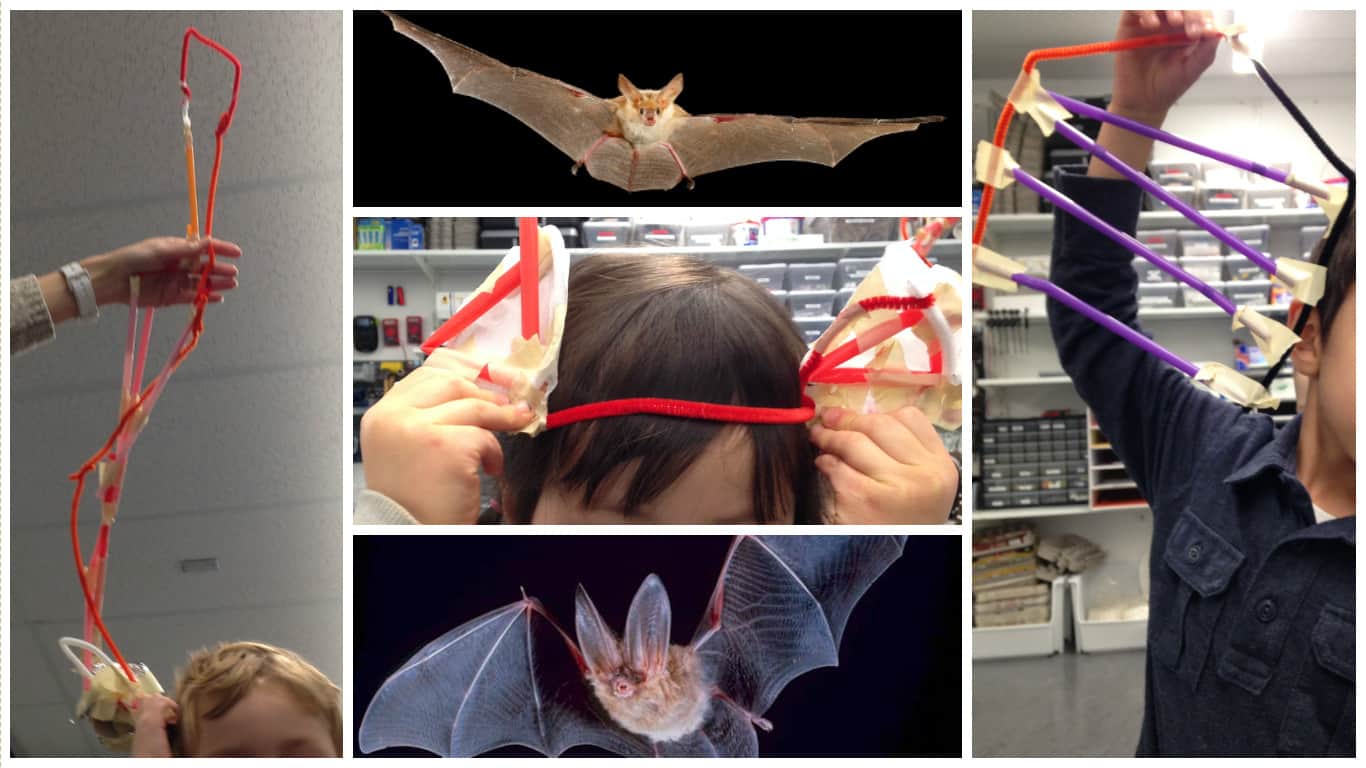
While this isn’t a technologically sophisticated project, it can be challenging to find quantities of materials that can allow you to carry out this project with many students. Below are the resources we used:
- Straws – $6.62 for 125
- Craft sticks – $8.06 for 1000
- Masking tape – $15.97 for 9 rolls
- Foil sheets – $10.25 for 500 – Using aluminum foil is not a sustainable choice, but it is an amazing material to build with. I leek it out slowly. These pre-cut sheets save immense time and tiny cuts.
- Corks – donated by families
- Chenille stems (“pipecleaners”) – $20.99 for 1000
- Hefty wood-cutting scissors – $19.75 each – These are truly miraculous for cutting skewers, craft sticks, corks, and more. They’re expensive, but I only have a couple pair.
To build bat ears with even 50 PreKers, one of each of the above would be plenty – two packs of straws if you’re feeling generous. That puts the cost of supporting PreKers tinkering skills, observation and analogy skills, and connection to the animals they love at… $68.51 with LOTS of leftovers for further projects. (Not including the hefty scissors.)
(Our kindergarteners used a similar range of supplies to invent wind measuring tools as part of their weather unit.)
1st Grade Spanish “Dia de los Muertos” Candles
The 1st grade Spanish project was admittedly teacher-led… Our primary Spanish teacher was SO excited about our makerspace that we brainstormed this project before the school year even started! 1st graders generally have very limited experience with circuitry, so we put a lot of thinking into how to prepare the materials to set them up for the best success. The 1st graders learned about Dia De Los Muertos and vocabulary related to the holiday, and then illustrated wrappers for their “candles” on templates we sized to wrap perfectly around a toilet paper roll.
We did quite a bit of prep work for the circuitry components ahead of time. We cut and stripped short bits of wire and assembled little “battery packs” that would make putting it all together appropriately challenging for the first graders’ first experience with circuits.
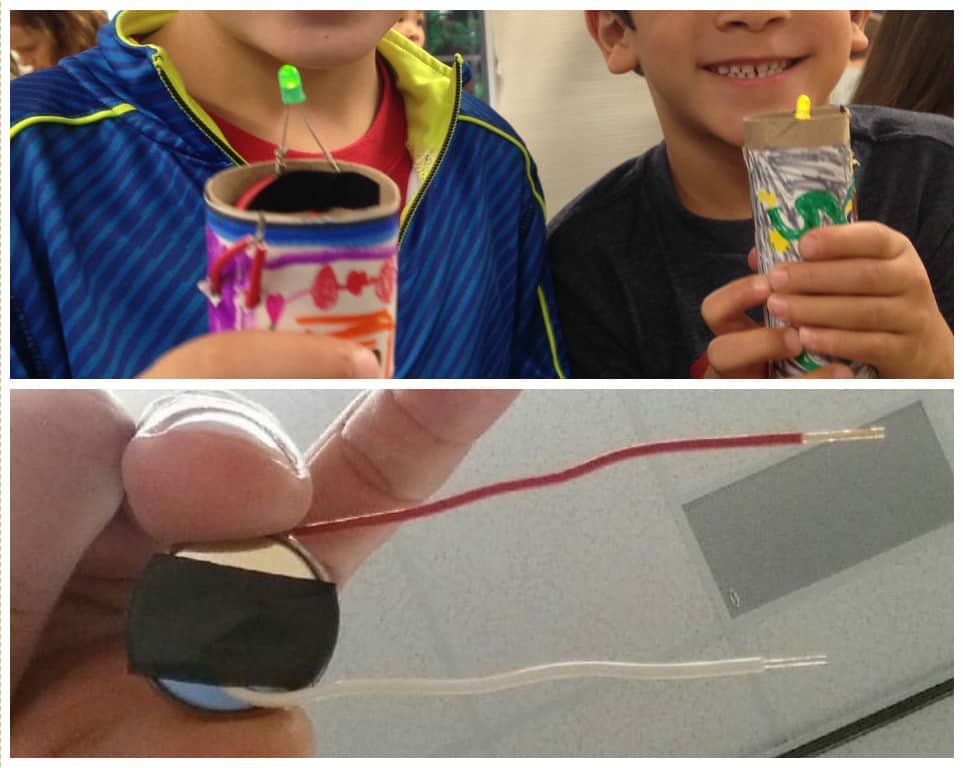
The “battery packs” are two short stripped pieces of wire, each simply electrical-taped around a coin cell battery. Tips: Make sure each stripped ends is only touching one flat side the battery. Don’t let the wire on the negative side touch the *side* of the battery. Also, you can use the end of the stripped wire as a little “hook” to keep the wire from slipping out of the tape.
This one is slightly more technologically sophisticated, but still not getting into complex equipment or anything that can’t be done in any classroom. Here are the resources:
- Toilet paper rolls – donated by families
- Drawing templates – print at school
- Aolored pencils / markers / scissors – please tell me you already have these
- 22-gauge solid wire – $21.95 for 150 ft – I’ve found that thinner wire (i.e. higher gauge number) is easier for younger children to handle since it bends more easily than thicker wire. This is also a multi-color pack, which can be handy for projects with lots of different crisscrossing wiring.
- 22-gauge stranded wire – $10.35 for 100 ft – Stranded wire can be a cheaper option, although I find that it’s harder for younger children to twist around the LED leads
- Wirestrippers that match your wire gauge – $10.07 each – You only need one pair if you’ll be doing all the stripping. If your older students – like 4th graders – will be stripping their own wires, it’s worth an investment in several strippers.
- Electrical tape – $7.09 each – to make the “battery packs”
- Coin cell batteries (CR2032s) This example is $10.98 for 20 – These can get expensive! I’ve had great luck hunting both eBay and Amazon for short-term deals, with 100 batteries for $20. Something to regularly be on the lookout for.
- LEDs – This example is $4.39 for 75 – These can be tricky when you start to buy them… I prefer LEDs that have visible colors rather than LEDs that are clear and only show their color when turned on. 5mm is the standard size, but you can also find 3mm (very small) and 10mm (“gumdrop”)
- Useful but not strictly necessary: copper tape, to wrap around LED lead / wire junctions and increase conductivity – $12.45
This results in about $60-70 for 40 students, with most of the expense in the batteries since each child needs their own battery. As in the bat ears above, there will be plenty of leftovers for future projects, except – in this case – the batteries.
(Our 4th graders are currently using the same style of simple circuitry to make maps of their American geography “Amazing Race!” projects, and the 2nd grade Spanish class made frames with candle motifs for a Dia de los Muertos project.)

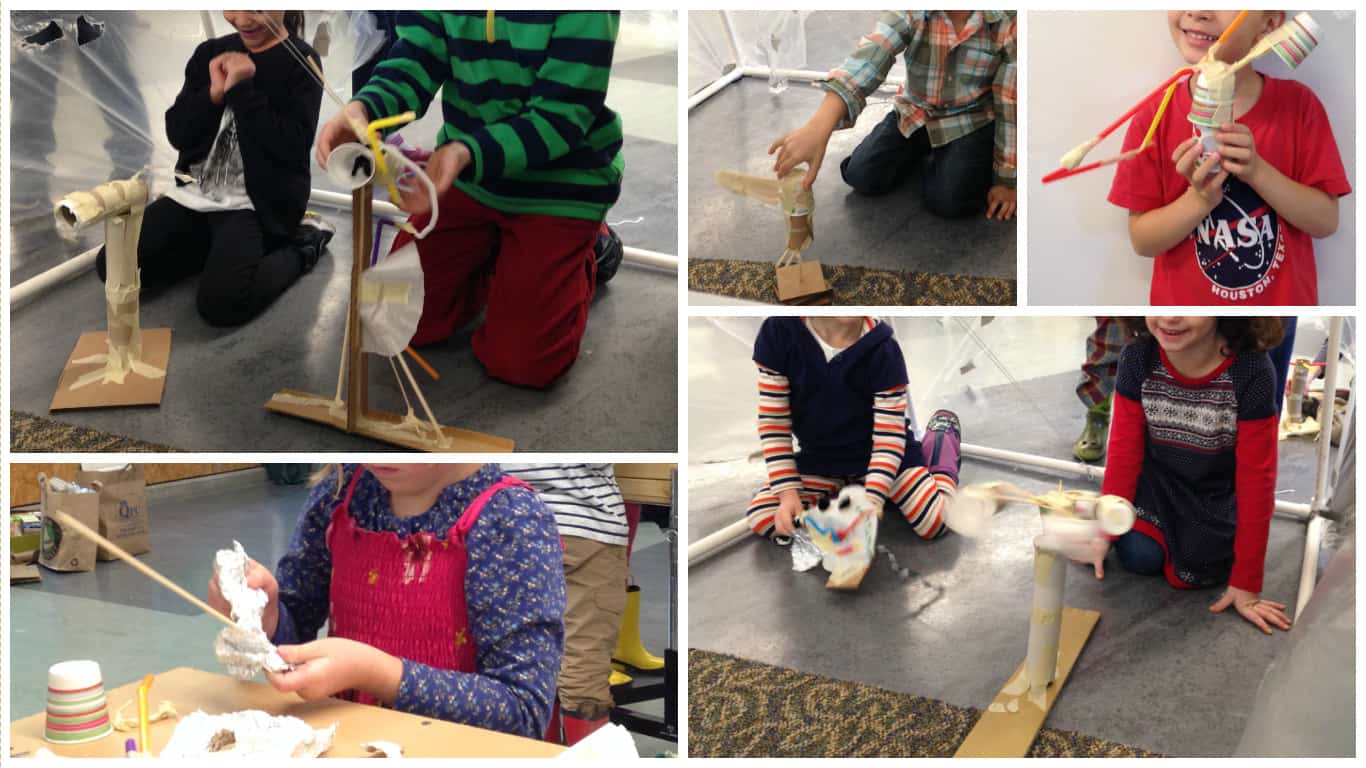
2nd Grade Book Dioramas
Everyone has the shoebox diorama as a tool in their classroom toolbox, and I’m sure almost every child in the US school system has made at least one. They might be cheesy, but they’re fun! Our 2nd graders asked if there was a way to make their dioramas show the action better, so we got out a robotics kit to incorporate into the dioramas.
In preparation, we pre-programmed the Hummingbird boards with an assortment of options, including servos moving in four different ways, LEDs blinking or still, and a multicolor LED on a rotary dial. We set up a sample rack where kids could easily see which wires went to which positions on the Hummingbird board. We then asked students to decide which style of servo or LED they wanted to use, and figure out where on their own board they’d need to plug in to make it work. It was a pretty amazing tinkering success!
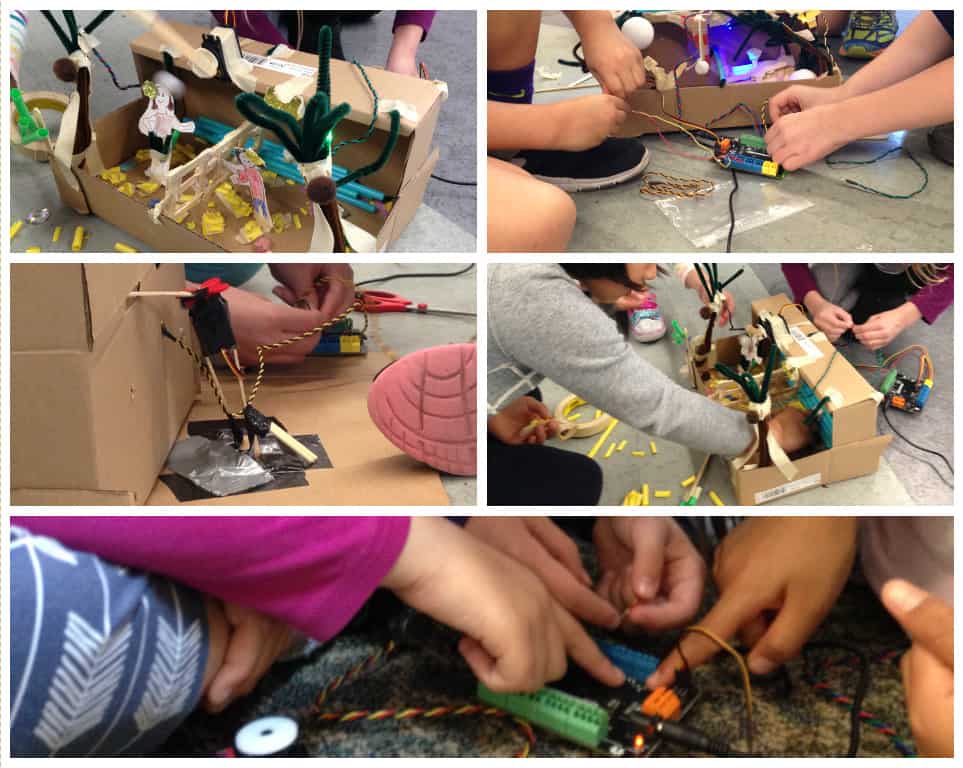
Hummingbird kits are *not* cheap, and you need one for each group. The premium kits , which we use, cost $270 each now — more than when we bought them. The $159 base kit could get most jobs done.
The littleBits Gadgets and Gizmos kit can be a good alternative for such a project, and comes in at $199.
Roominate has a more limited tool set, but still has lights and motors (but not servos). Really the key elements in this learning activity example. Their sets are mostly well south of $100.
All of the above are excellent tools that can be used again and again in different projects and with different age levels, so can be worth the investment.
(Our 8th graders are currently using our Hummingbird kits to hone their programming skills, and one 7th grader used a Hummingbird kit to develop her animal crossing warning system invention.)
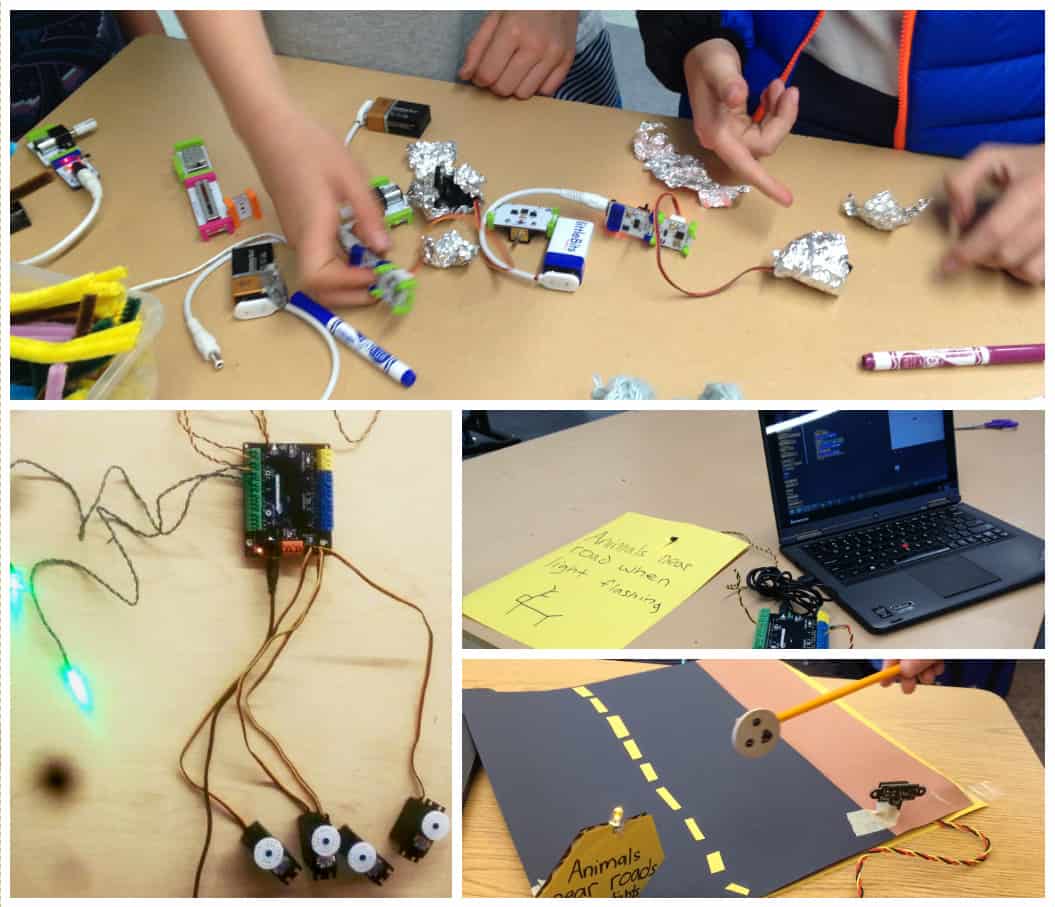
5th grade weather cycles / Mandarin daily routines
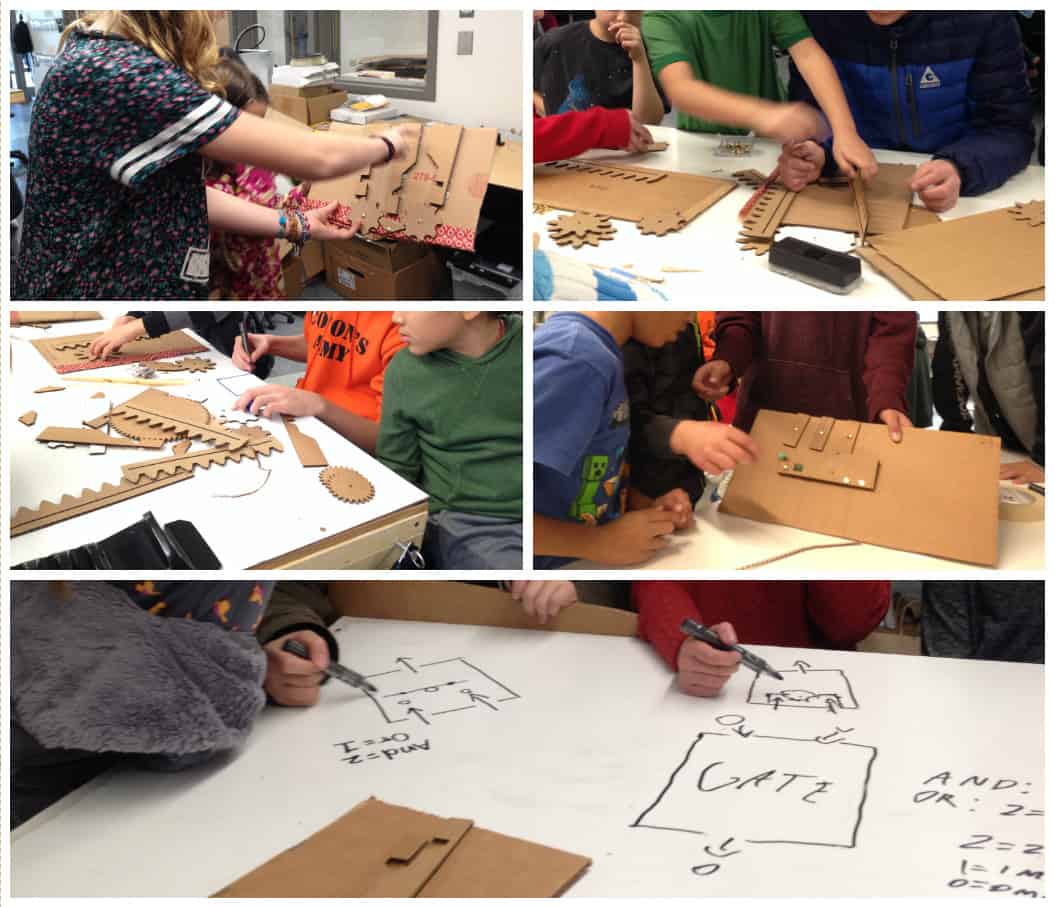
This last project is probably the least technologically complex, but requires significant technology to pull it off in the way that we did. We recently were lucky enough to be able to purchase an Epilog laser cutter, and so have been building up a library of laser cut cardboard gears (via geargenerator.com) to make available for all sorts of projects.
Laser cutters make truly excellent, precise gears. 3D printers can also get that job done. But those are very expensive tools that are outside the realm of practicality in many classrooms. Alternatively, crown/spur/lantern gears are easy and cheap to make using just cardboard and skewers or dowels. (Lantern gears are also known as cage gears.)
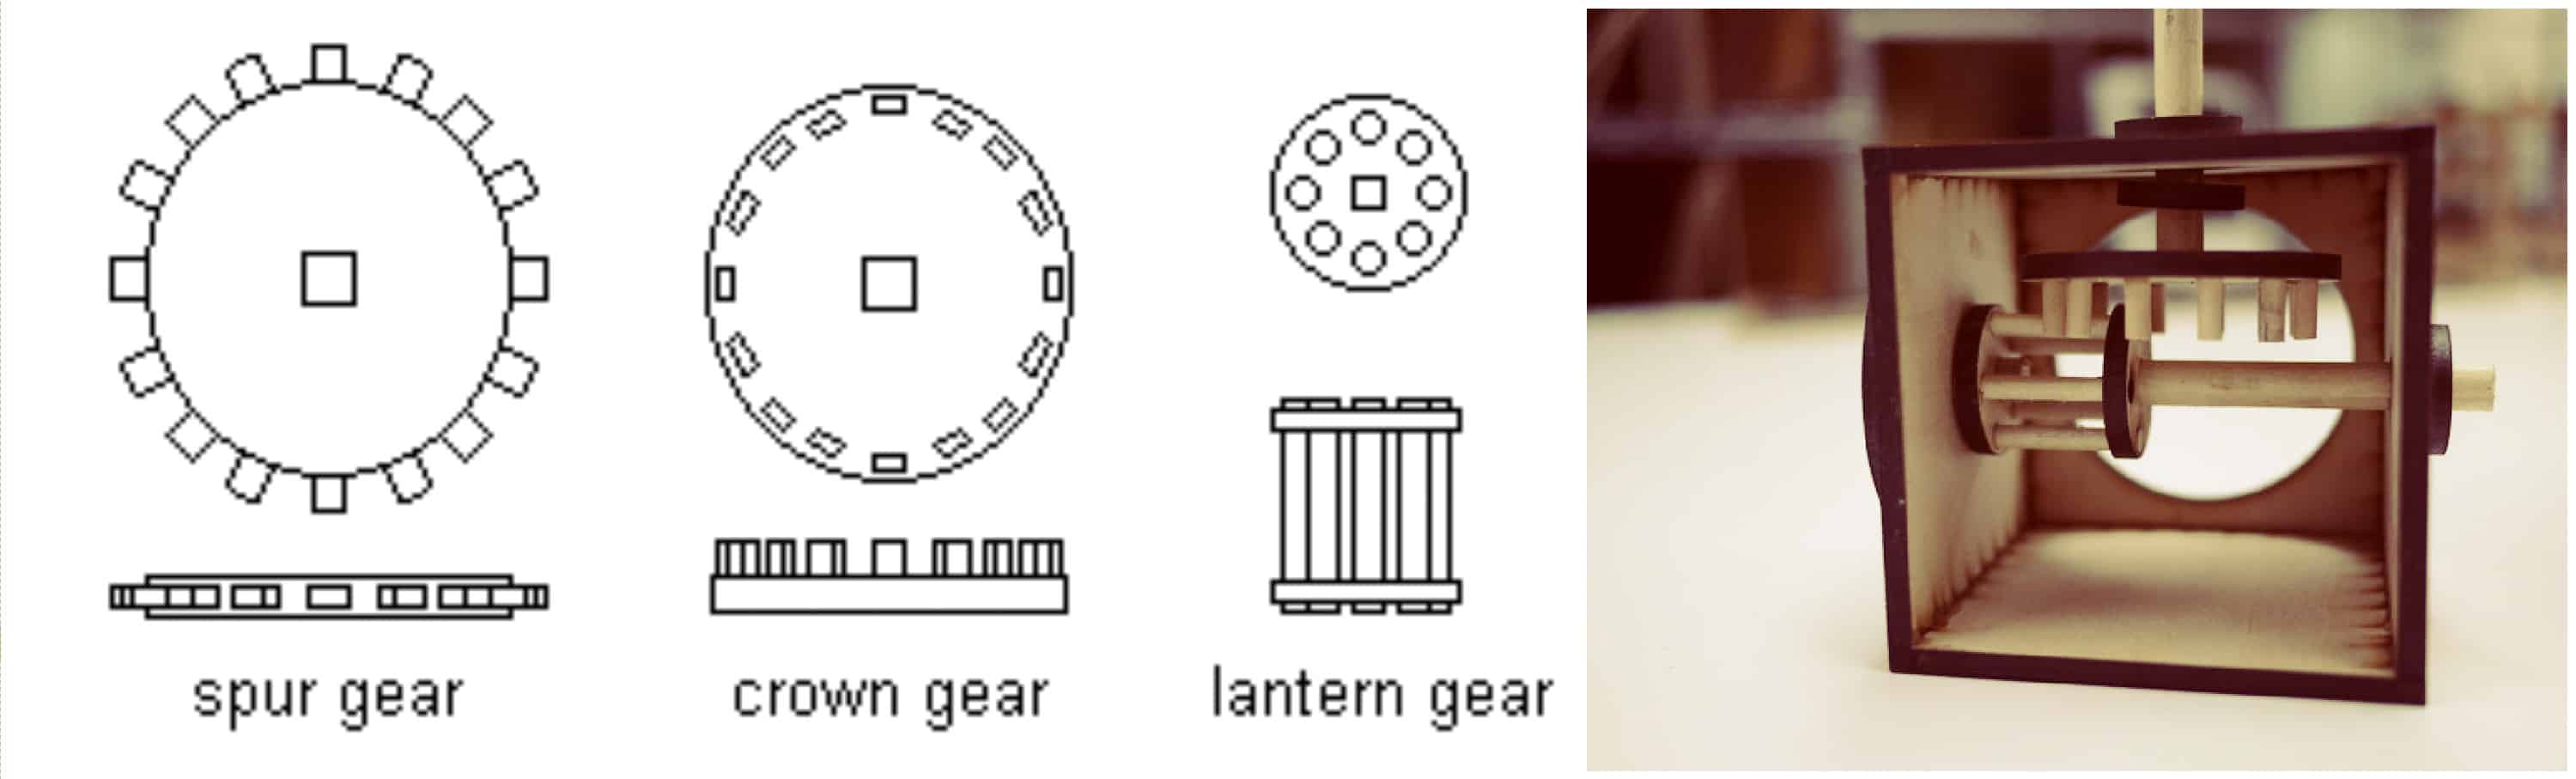
Images: J.B. Calvert and Diego Fonstad
Just plain cardboard with some good scissors has definitely been our most fun, versatile, and heavily-used material in our makerspace!
- Skewers – $3.75 for 100
- Hefty wood scissors – $19.75 each – for cutting skewers, another use for these same awesome scissors I mentioned earlier
- Titanium scissors – $14.94 for 3 – for cutting cardboard
- Power cutter – $88 each – for cutting cardboard FAST. eep! this is double what I paid only a few months ago
- Cardboard – save all the boxes!
(Our 7th graders are also currently using gears to show alternative history timelines leading up to the Civil War. What if the Erie Canal never opened? What if immigration in the early 1800’s was curtailed? Finally, cross-age groups of kids teamed up for Hour of Code to build mechanical “AND” and “OR” gates using cardboard gears!)
With all the projects that are coming out of our work in STEM, tinkering, and student-driven learning, we’re starting to narrow in on some sort of specific heuristic or model we can use to describe our development process. I love sharing examples of the amazing learning experiences we engage in, but I’m most looking forward to being able to share a broader process that can support other teachers in developing such learning experiences for their own students and local context. Soon…
For more blogs by Lindsey, check out:
- A Challenge to Bring Making Into Hour of Code
- 3 Lenses for Developing Deeper Driving Questions
- 8 Tips in Taking on School-Wide Makerspace Leadership
Stay in-the-know with all things EdTech and innovations in learning by signing up to receive the weekly Smart Update.


0 Comments
Leave a Comment
Your email address will not be published. All fields are required.